Flying paper planes
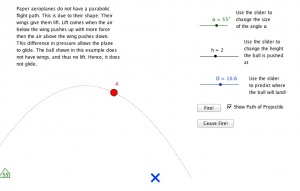
Lesson idea. Geogebra has been used to produce an animated tutorial of an origami paper aeroplane). Once the plane has been made, experiments with throwing the plane show that it does not fly in a parabolic curve, as a ball would. An interactive geogebra spreadsheet shows how a ball would fall. Another geogebra spreadsheet demonstrates the flight trajectory of the plane. I have also produced a word document describing very simply, how the plane flies.
| Resource details | |
| Title | Flying paper planes |
| Topic | |
| Teaching approach | |
| Learning Objectives | |
| Format / structure | wiki page with downloadable .doc version |
| Subject | |
| Age of students / grade | |
| Table of contents | |
| Additional Resources/material needed | |
| Useful information | |
| Related ORBIT Wiki Resources | This activity was a result of the GeoGebraSTEM exploration day umbrella activity which asked students to develop 'real world' GeoGebra mathematical modeling applications which reach out to a wide range of users both students and teachers. It is described in their own words. |
| Other (e.g. time frame) | |
| Files and resources to view and download | Here are three simple to use GeoGebra activities produced by the students which can be used to both understand flight and further stimulate new students. The first is an Origami tutorial: The second shows parabolas: The third shows a plane's flight: This is accompanied by an excellent description: |
| Acknowledgement | |
| License | |
Guidance notes
1) Overview
After learning the concepts of perimeters and areas, it is easy for students to think that figures with larger perimeters would also have larger areas, and vice versa. This applet helps teachers to explore with students the variety of the perimeters of a figure formed by several congruent squares touching side by side. Together with the complementary applet Variety of areas with fixed perimeter, teachers can clarify with students that a figure with a larger area may have a smaller perimeter, and areas and perimeters are two different concepts.
2) Learning Objective
- Recognise that figures with the same areas could have different perimeters.
- Recognise the strategy of minimizing the perimeters of figures with the same areas.
3) Teaching Approach
An enquiry teaching approach is expected. Students are asked to arrange 3 to 9 squares to form different figures and find their possible perimeters. Teacher then guide students to express their strategies of getting the largest and smallest perimeter with a certain number of squares.
4) Teacher’s Note
For each number of squares, ask students to record the possible perimeters in the table of the applet. Guide students to focus on the change of the perimeter when a square is dragged to a new position. Discuss with students the strategy of minimizing the perimeter, especially for 4 and 9 squares.


