Session 1.3 - Activity planning and reflection
Learning intentions and objectives.
In this session you will learn about:
- keeping a reflective journal as part of the process of ongoing reflective practice, and using reflective questions to aid this process,
- differences between an interactive teaching classroom and a traditional classroom,
- using mini blackboards and digital images as tools in an interactive teaching activity, and
- using the Think-Pair-Share technique to encourage cooperative learning.
Success criteria.
To meet the learning intentions you will:
- record reflections on trialled activities in a learning journal soon after the activities have been carried out, and use reflective questions to help structure journal entries,
- accept that during interactive teaching the classroom may be more noisy and children may move around independently,
- plan an activity that makes use of mini blackboards and digital images, and trial it in the classroom, and
- plan an activity using the Think-Pair-Share technique that allows students to interact with each other, and trial it in the classroom.
ICT components.
The ICT components you will focus on are
- viewing slideshows using the web browser and Open Office and
- manipulating slides in Open Office.
Classroom based activities (with your students, after this session):
- You will repeat the netbook familiarisation activity from last session, and
- you will try the same activity with your students: viewing a slideshow.
Review of follow-up activities from last session
If you are running a professional learning programme which follows these sessions in sequence, then you should do the review of follow-up activities relating to the (Category:OER4S CPD). The 'review of follow-up activities' for that session is available, and also shown below in the session text. However, if you are following selected sessions in a different order, then you should use the reflection appropriate to the previous session you did.
The review of the follow-up activities for this session (to be done at the start of the next session) is available here.
There is no review of follow-up activities from last session available. You can go to the previous session () and.
Reflective journal
In this section, we introduce the notion of a reflective journal to support the process of ongoing reflective practice and the Plan-Teach-Reflect(a) cycle. The teachers have already heard about doing reflections in the last session, but now we formalise this slightly.
Emphasise concrete planning of time for doing reflections.
![]() Introduction (5 min) to keeping a reflective journal. Ideally teachers would keep a booklet and also keep a copy of the following questions handy to guide reflections. This journal can be brought along to workshop sessions and any pertinent reflections made during the activities in the session can also be written in it. You can refer back to the previous session for guidance on reflection.
Introduction (5 min) to keeping a reflective journal. Ideally teachers would keep a booklet and also keep a copy of the following questions handy to guide reflections. This journal can be brought along to workshop sessions and any pertinent reflections made during the activities in the session can also be written in it. You can refer back to the previous session for guidance on reflection.
As a facilitator, how will you know whether these questions have been understood? In the classroom, we often ask students: "Have you understood? Are we clear?", to which the students always answer: "YES!". An important part of becoming an interactive workshop facilitator or an interactive teacher is to know how to ask the right questions, to actually probe whether participants have understood.
One important question for this is: "Can you give an example?" So as you go through the reflective questions below, ask participants to give/record examples to back up their observations. This might mean that they write about what a particular student said or how a particular student responded.
![]() Whole class dialogue (10 min): Whole group discussion on reflective questions. As a group, read through the following questions, making sure that everyone understands how to use them.
Whole class dialogue (10 min): Whole group discussion on reflective questions. As a group, read through the following questions, making sure that everyone understands how to use them.
For each reflection, first note down the day of the week and the date today, so that you can keep track of your reflections and how your teaching practice evolves over time.
Questions to help you:
- What subject was the lesson (e.g. maths / science / other) and what was the lesson about (i.e. the topic, e.g. long division)?
- What interactive technique did you choose to use (ICT-based or not ICT-based)?
- What resources were used (both ICT and non-ICT)?
- What did you expect to achieve with the strategy adopted?
- What were the outcomes? (e.g. What do you think pupils learned about the topic? How can you tell? Any unexpected occurrences?)
- If ICT was used, do you think the use of ICT in this particular lesson contributed to pupil understanding of subject concepts? How?
- What difficulties did you encounter?
- What were the positive aspects of this experience?
- What did the children get out of the activity? How can you tell?
- How did you (as the teacher) find out what the children learnt / thought about the activities / got out of them?
- What did you (as the teacher) get out of it?
- Did you find it difficult?
- Did the activity allow students to meet the learning objective that it was designed to address?
- What would you do differently next time?
Space for your own questions:
- ____________________________________________________________________________________________
- ____________________________________________________________________________________________
- ____________________________________________________________________________________________
- ____________________________________________________________________________________________
- ____________________________________________________________________________________________
You can print this content on a separate sheet here: OER4Schools/reflective journal questions.
In some schools, teachers have recorded reflections on a dictaphone. A separate sheet with questions is available here: audio diary guidance.
For the trial, also use dictaphones. How are the teachers finding that? See more expanded list of questions in the audio diary guidelines.
Examples of interactive teaching in Zambia
Many African teachers aspire to be interactive teachers. Yet, interactive teaching is not common in the African classroom. However, it can work in this context!
The following clip shows Eness, a teacher in a community school near Lusaka interacting with a Grade 3 class. Watch the clip of her class discussion about Is a bat a bird?
![]() Observing, thinking, reflecting (5 min): Watch a video of a whole class discussion. Read the following questions for reflection, and then watch the video.
Observing, thinking, reflecting (5 min): Watch a video of a whole class discussion. Read the following questions for reflection, and then watch the video.
- What have you noticed?
- How are the learners taught?
- How do you think they will react to the homework task?
- Is this classroom different from yours?
- What is interactive teaching?
VIDEO
Whole class discussion
Whole class discussion of ‘Is a bat a bird?' Teacher sets unresolved problem as homework
Video/Eness vertebrates 12.mp4, https://oer.opendeved.net/wiki/Video/Eness_vertebrates_12.mp4,This video is available on your memory stick in the video/Eness Vertebrates folder. Duration: 4:19 watch on YouTube, local play / download options / download from dropbox)(Series: Eness Vertebrates, episode 12)(Transcript available here or via YouTube captions.)
![]() Whole class dialogue (10 min): Whole group discussion on the whole class discussion video. We asked you look at the following questions:
Whole class dialogue (10 min): Whole group discussion on the whole class discussion video. We asked you look at the following questions:
- What have you noticed?
- How are the learners taught?
- How do you think they will react to the homework task?
- Is this classroom different from yours?
- What is interactive teaching?
Now discuss these questions as a group.
Issues to discuss
- Noisy but productive - A classroom can be noisy and productive at the same time
- interactive = inter-action (with view to sense making; i.e. purpose of inter-action is to make sense)
- Children making sense of ideas for themselves, developing their own classifications, relating to what they already know...
- Teacher not telling answer, asking students to investigate for themselves
Facilitator needs to know how to deal with criticisms (such as too noisy, too much chaos, not productive)
The road is long. But it can be done!
Practitioner reflection on interactive teaching
![]() Observing, thinking, reflecting (5 min): Practitioner reflection on interactive teaching. The key to interactive teaching is teachers shifting “from telling to listening” and learners shifting from receiving information to making sense of it for themselves.
Observing, thinking, reflecting (5 min): Practitioner reflection on interactive teaching. The key to interactive teaching is teachers shifting “from telling to listening” and learners shifting from receiving information to making sense of it for themselves.
How can we “listen” to learners? What does that mean in practice?
Facilitator describes own experience of shifting to interactive teaching and how it is different in his/her classroom now…
Evidence for impact of interactive teaching (optional)
Generally, we have experienced that teachers welcome interactive ways of teaching. However, it is possible that teachers may object to, or have major concerns about, the interactive teaching shown in the videos, as well as what has emerged from this discussion. For instance, they may say that this just will not work in their classroom, that it may not work with large classes, or perhaps that such styles of teaching would not be welcome by parents or head teachers for various reasons.
At this stage, you could introduce interactive teaching as an international trend. Research evidence from different countries shows that this kind of active learning is both motivating and far more effective for learning than direct instruction (“chalk-and-talk” or lecturing). In particular, independent, collaborative or oral work, as well as questioning and whole-class discussion that encourage pupils to grapple with ideas are effective. They lead to long-term and deeper learning rather than memorising facts (resulting in short-term, superficial learning).
The following video clip may help to reinforce the point.
![]() Observing, thinking, reflecting (5 min): Watch a video on one Zambian teacher’s experience of interactive teaching.
Observing, thinking, reflecting (5 min): Watch a video on one Zambian teacher’s experience of interactive teaching.
VIDEO
Agness Tembo speaking at eLearning Africa 2010 in Lusaka, Zambia
Agness Tembo speaking at eLearning Africa 2010 in Lusaka, Zambia
Video/Agness Tembo at eLA 2010 Zambia.mp4, https://oer.opendeved.net/wiki/Video/Agness_Tembo_at_eLA_2010_Zambia.mp4,This video is available on your memory stick in the video/Talks folder. Duration: 12:34 (Series: Talks, episode 02)
This two minute clip features Agness Tembo, a Grade 2 teacher from Chalimbana Basic School located in a rural area of Zambia. She is presenting at the e-Learning Africa Conference 2010 her own experiences of participating in Phase 1 of the OER4Schools research project. She talks animatedly about the challenges she faced in introducing both ICT and interactive pedagogy into her (mathematics) teaching for the first time, the benefits to students, and the qualities she needed as a teacher to make the shift successful.
![]() Introduction (5 min) of Think Pair Share. This is a technique that encourages cooperative learning by peer interactivity. Here are the steps:
Introduction (5 min) of Think Pair Share. This is a technique that encourages cooperative learning by peer interactivity. Here are the steps:
- Think - Students listen to a question (this may be an open-ended question to which there are many answers) or a presentation and are given ‘think time’ to formulate their responses.
- Pair - Following the ‘think time’, students work together with a partner, sharing ideas, discussing, clarifying and challenging.
- Share -The pair then share their ideas with another pair, or with the whole class. Students should be prepared to share their partner’s ideas as well as their own.
Tips for using the techniques successfully:
- Allowing students time to think, sometimes referred to as 'wait time' has been shown by researchers to improve the quality of their responses. Talking through ideas with a partner first before sharing them with a wider audience allows for those ideas to be elaborated on and refined.
- When using this activity in the classroom it is not necessary to take feedback from all groups every time. This would be quite time consuming and may not be particularly edifying. Teachers can walk around and listen to the students talking in their pairs and perhaps call on those that they know will have something interesting to contribute. Whilst all students should be given the opportunity to contribute during lessons it is not necessary to give everyone that opportunity in every activity.
Strategy for keeping track of who has contributed during activities/lessons:
By putting a little dot next to the names of the students in the class list for a particular lesson (or the register) you can easily keep track of those students that have been called on during that lesson and incorporate that into your planning.
You will now use this technique to help you to formulate your ideas on interactive teaching.
Think-Pair-Share(a):
Teachers should cue the progress from one step to the next. In the primary classroom, hand signals for each step can be developed with the students and these can be used along with verbal cues.
Allowing students time to think, sometimes referred to as 'wait time' has been shown by researchers to improve the quality of their responses. Talking through ideas with a partner first before sharing them with a wider audience allows for those ideas to be elaborated on and refined.
Model the think pair share technique in the following activity, remembering to tell the participants what step they are on, what they should be doing and for how long.
![]() Think-Pair-Share (10 min) your ideas on the differences between interactive teaching and traditional teaching.
Think-Pair-Share (10 min) your ideas on the differences between interactive teaching and traditional teaching.
We mentioned that interactive teaching involves moving from “telling” to “listening.” What other words do you feel might describe the difference between traditional approaches and interactive teaching? What are the two kinds of classroom like? Think on your own for a minute and then pair up and discuss your ideas with a partner. Write your ideas on the board for all to see. Aim for each person to write a word or phrase for each approach perhaps under the headings 'traditional classroom' vs 'interactive classroom'.
Some contrasts people might make (let them suggest their own terms):
- passive - active
- quiet - noisy
- individual - collaborative
Note: these are not value judgments - they can be positive or negative in different circumstances!
The Zedupad resource Taking care of the environment (see link below) could be used as an engaging context through which to introduce your students to the think-pair-share technique. It offers a bird's eye view of a village both before and after its inhabitants decided to take care of it.
Slide 3 asks the following question:
- Whose responsibility is it to care for the environment?
And slide 4 asks students to look at a picture and identify the ways in which the village is being badly cared for. You could try using the think-pair-share technique with either or both of these questions.
ICT practice: Practical activity
![]() Same-task group work (20 min):Practical activity in small groups on the exploration of a slideshow using the a web browser. In the last session, we looked at a basic netbook familiarisation. Make sure that you are happy with that activity so far. Discuss any issues with your partner.
Same-task group work (20 min):Practical activity in small groups on the exploration of a slideshow using the a web browser. In the last session, we looked at a basic netbook familiarisation. Make sure that you are happy with that activity so far. Discuss any issues with your partner.
We now use the browser to display images, and do a learning activity. Take a netbook per pair, start the netbook, open the browser, and navigate to this page:
Consider the following questions:
- What are the technical difficulties and challenges to you running this activity now?
- What do you think will the challenges be when you run this activity with your students in class? (Make notes on this in your reflective journal - we will refer back to these when you have done this activity in class.)
- What can you say about how you might classify the images?
Note that in the 'follow-up' you will try the same activity with your students in the classroom, so it is very important to anticipate any issues that may arise.
Note: You can download the slideshow for local use here: File:Images of living things slideshow.zip
![]() Same-task group work (10 min): Pair work on viewing a slideshow in Open Office. You can download an Open Office slideshow of images of living things by clicking on this link here: living things slideshow.odp (info). This slideshow contains mostly the same images as the browser based slideshow but it has some advantages and perhaps some disadvantages over the browser based one. Discuss these advantages and disadvantages with a partner after you have experimented with opening the slideshow and hiding slides.
Same-task group work (10 min): Pair work on viewing a slideshow in Open Office. You can download an Open Office slideshow of images of living things by clicking on this link here: living things slideshow.odp (info). This slideshow contains mostly the same images as the browser based slideshow but it has some advantages and perhaps some disadvantages over the browser based one. Discuss these advantages and disadvantages with a partner after you have experimented with opening the slideshow and hiding slides.
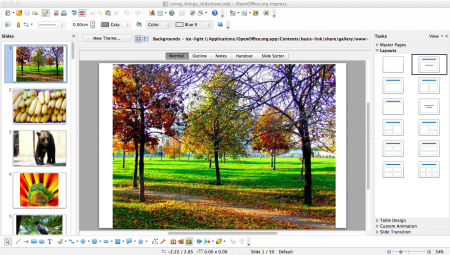
Here is a screenshot of what you will see when you open the slideshow using Open Office Impress.
As you click on the thumbnails on the left hand side they appear in the workspace. If you hover your mouse over a thumbnail on the left hand side you will get the option to Start Slide Show/Hide Slide/Duplicate Slide.
- Experiment by hiding all the slides of animals, by clicking Hide Slide on each thumbnail of the slide that you want to hide.
- Start the slide show by hovering over the thumbnail of the first slide and clicking the Start Slide Show option.
- Proceed through your slideshow of plants/trees/vegetables/fruit by right clicking the mouse or using the forward arrow on the keyboard.
- Unhide slides by clicking the Show Slide option that appears when you hover your mouse over hidden thumbnails.
- If you accidentally duplicate a slide you can reverse this by clicking Edit (next to File) and choosing Undo from the drop down menu.
- To close the slideshow, click File on the bar at the top of the screen and choose Close from the drop down menu.
Classifying animals using digital images
![]() Observing, thinking, reflecting (15 min): Watch the following video sequence of a Zambian teacher's interactive lesson on classifying animals using digital images. Pause after each clip for a brief discussion with a partner: What would you record on an activity template to capture this activity? (There is no need to actually write on it.)
Observing, thinking, reflecting (15 min): Watch the following video sequence of a Zambian teacher's interactive lesson on classifying animals using digital images. Pause after each clip for a brief discussion with a partner: What would you record on an activity template to capture this activity? (There is no need to actually write on it.)
Eness_vertebrates_clips 2,4,6: (1 min. 40, 2 mins. 43, 3 mins. 43 = 8 mins. 06 total)
VIDEO
Students hand out blackboards
Students hand out blackboards themselves (active)
Video/Eness vertebrates 2.mp4, https://oer.opendeved.net/wiki/Video/Eness_vertebrates_2.mp4,This video is available on your memory stick in the video/Eness Vertebrates folder. Duration: 1:40 watch on YouTube, local play / download options / download from dropbox)(Series: Eness Vertebrates, episode 02)(Transcript available here or via YouTube captions.)
VIDEO
Teacher repeats and clarifies
Teacher repeats and clarifies instructions; she illustrates them with nonsense classifications so students do not copy hers
Video/Eness vertebrates 4.mp4, https://oer.opendeved.net/wiki/Video/Eness_vertebrates_4.mp4,This video is available on your memory stick in the video/Eness Vertebrates folder. Duration: 2:43 watch on YouTube, local play / download options / download from dropbox)(Series: Eness Vertebrates, episode 04)(Transcript available here or via YouTube captions.)
VIDEO
Mini-blackboards group work
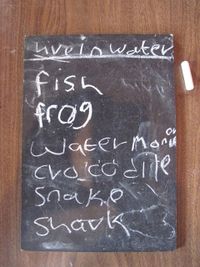
Groupwork using mini-blackboards: group of 5 recording under their own category of ‘animals with no legs’ and interacting as a group
Video/Eness vertebrates 6.mp4, https://oer.opendeved.net/wiki/Video/Eness_vertebrates_6.mp4,This video is available on your memory stick in the video/Eness Vertebrates folder. Duration: 3:43 watch on YouTube, local play / download options / download from dropbox)(Series: Eness Vertebrates, episode 06)(Transcript available here or via YouTube captions.)
TOTAL: 8:06
This video sequence contains three consecutive clips from the same lesson you saw earlier, showing:
- Clip 2: Students hands out blackboards themselves (active),
- Clip 4: Teacher repeats and clarifies instructions; she illustrates them with nonsense classifications so students do not copy hers, and
- Clip 6: Groupwork using mini-blackboards: group of 5 recording under their own category of ‘animals with no legs’ and interacting as a group.
![]() Whole class dialogue (10 min): Whole group discussion on a Zambian teacher's interactive lesson on classification using digital images. When you have discussed these clips one by one in pairs, come together as a whole group and continue to discuss the clips, using the following questions to help guide the discussion:
Whole class dialogue (10 min): Whole group discussion on a Zambian teacher's interactive lesson on classification using digital images. When you have discussed these clips one by one in pairs, come together as a whole group and continue to discuss the clips, using the following questions to help guide the discussion:
- What new techniques was Eness using this time?
- How did she ensure that children were active?
- What role did the mini blackboards play?
- How can teachers create a good relationship with their class so that children can learn?
- What kind of classroom atmosphere supports learning?
![]() Same-task group work (5 min): Pair work on planning a classification activity. In a pair, plan your own classification activity using the browser based slideshow that you have been exploring. The classification activity that you choose should be appropriate for the age of your students and be for use in a lesson that you are teaching imminently. You may want to pair up with a teacher of the same grade if this is possible. Plan to make use of the mini blackboards during the activity. For younger groups of students you may want to choose a few images to use at the front of the class to stimulate discussion.
Same-task group work (5 min): Pair work on planning a classification activity. In a pair, plan your own classification activity using the browser based slideshow that you have been exploring. The classification activity that you choose should be appropriate for the age of your students and be for use in a lesson that you are teaching imminently. You may want to pair up with a teacher of the same grade if this is possible. Plan to make use of the mini blackboards during the activity. For younger groups of students you may want to choose a few images to use at the front of the class to stimulate discussion.
Record the planned activity in an activity template.
Questions to help you complete the template for this specific kind of activity - Classification activity using digital images for the students to look at and mini blackboards for them to record their ideas:
- How will you use the digital images?
- What is the learning objective for the activity? How will using digital images help the students to achieve this?
- Will individuals or pairs have a blackboard?
- What is the purpose of recording on a blackboard? For example, will all learners hold them up to show me their ideas? Will they discuss with peers? Will they record the results of a learning activity? Will they write or draw on the blackboards?
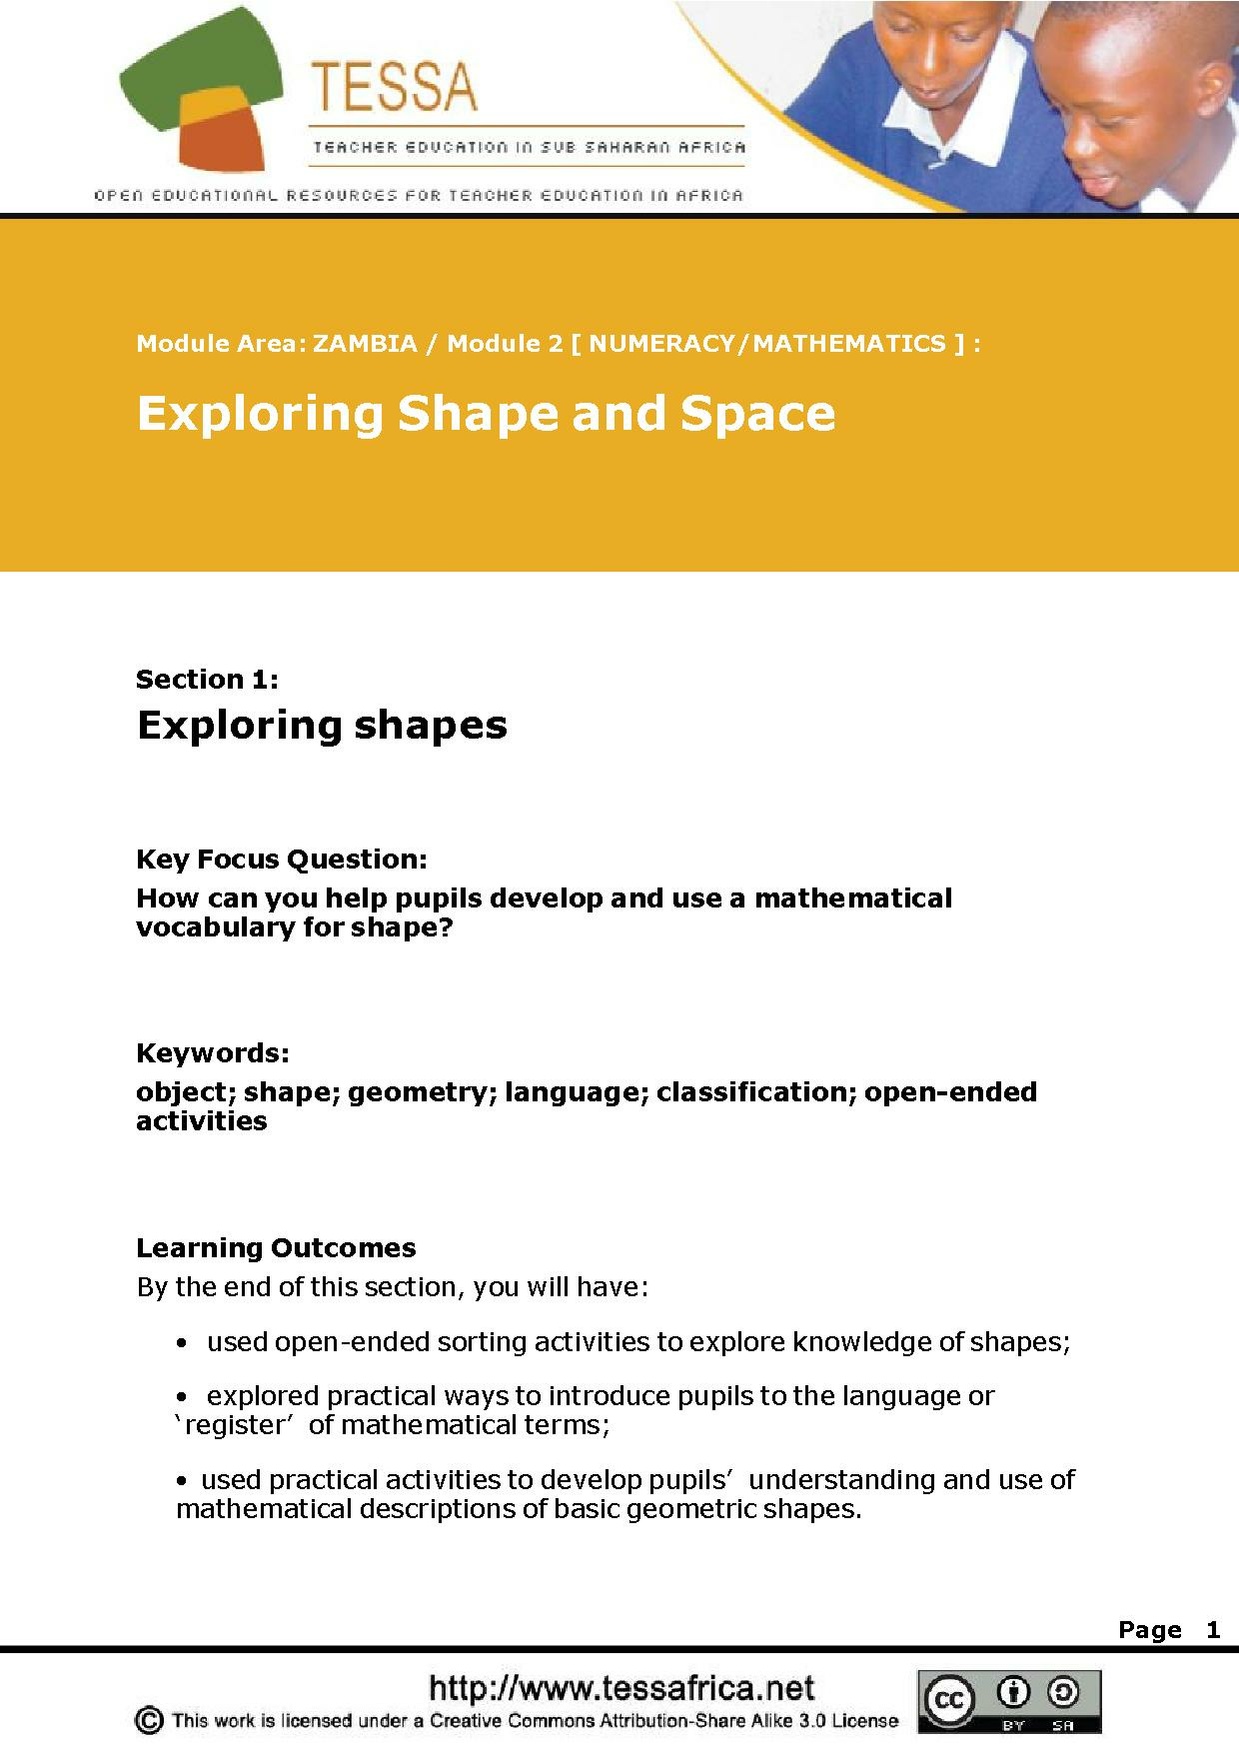
This TESSA resource on exploring shapes provides an additional context for classification (mathematics) and does not require the use of ICT. Activity 1: Helping pupils sort real objects (on page 4 of the resource) includes useful ideas on how you can set the scene for an open-ended task encouraging students to come up with different ways of classifying everyday objects. The rest of the resource goes on to introduce the mathematical vocabulary needed to describe and classify shapes effectively and introduces a fun 'feely bag' idea.
This related ORBIT resource Exploring shape allows you to see at a glance the material that is included in the resource below.
Draw participants attention to the TESSA resource.
Typing practice
Although typing is a fairly mechanical skill, it is really important that all participants learn to type reasonably well. They do not need to be able to type very fast, but they do need to learn how to type reliably, and without searching for keys.
It is best to address this by using a "typing tutor" programme, and for the participants to do regular individual practice. We would recommend that they do about 15 minutes every few days (ideally three times a week).
![]() Same-task group work (10 min): Pair work on familiarisation with typing tutor Familiarise yourself with a typing tutor programme. From now on, you should spend a little bit of time practising typing, ideally a few times a week. This will really help you speed up your interaction with the netbooks.
Same-task group work (10 min): Pair work on familiarisation with typing tutor Familiarise yourself with a typing tutor programme. From now on, you should spend a little bit of time practising typing, ideally a few times a week. This will really help you speed up your interaction with the netbooks.
Record your typing speed in your reflective journal.
Follow-up activities
![]() Agreeing follow-up activities (5 min).
Agreeing follow-up activities (5 min).
Part A: Practical classroom ICT-based activities. Repeat the netbook familiaristion, leading into the classification activity that you have planned in this session, making use of digital images and mini-blackboards.
Part C: Reflections. Also, plan and do a Think-Pair-Share activity in one of your lessons.
Part C: Reflections. Reflect on both of these activities soon after you do them, making a note of your reflections in your journal. Use the reflective questions from this session and the last session to guide you.
Part D: Next time. Don’t forget to bring your activity plans again, and your recorded reflections.
In a future session, you will learn how to make your own slideshows. If you are ambitious, you might want to explore how to do this yourself.
Remember the brainstorm from last week? Depending on how long you have between sessions, participants should also repeat the brainstorm. There's no need to reflect on that specifically, as the main focus is on digital images and mini-blackboards.
In the next session, these follow-up activities will be reviewed. If you are using this session on its own, you can have a look at the review of follow-up activities here.
At the end of each session, we provide an overview of the activities in this session, together with their suggested timings. Although this appears at the end of the session (for technical reasons), you should keep an eye on this throughout the session, to make sure that you are pacing the workshop session appropriately!
Total time: 130 (min)
Activities in this session:
- Introduction (5 min) to keeping a reflective journal.
- Whole class dialogue (10 min): Whole group discussion on reflective questions.
- Observing, thinking, reflecting (5 min): Watch a video of a whole class discussion.
- Whole class dialogue (10 min): Whole group discussion on the whole class discussion video.
- Observing, thinking, reflecting (5 min): Practitioner reflection on interactive teaching.
- Observing, thinking, reflecting (5 min): Watch a video on one Zambian teacher’s experience of interactive teaching.
- Introduction (5 min) of Think Pair Share.
- Think-Pair-Share (10 min) your ideas on the differences between interactive teaching and traditional teaching.
- Same-task group work (20 min):Practical activity in small groups on the exploration of a slideshow using the a web browser.
- Same-task group work (10 min): Pair work on viewing a slideshow in Open Office
- Observing, thinking, reflecting (15 min): Watch the following video sequence of a Zambian teacher's interactive lesson on classifying animals using digital images
- Whole class dialogue (10 min): Whole group discussion on a Zambian teacher's interactive lesson on classification using digital images
- Same-task group work (5 min): Pair work on planning a classification activity
- Same-task group work (10 min): Pair work on familiarisation with typing tutor
- Agreeing follow-up activities(5 min).
If you have printed this session for offline use, you may also need to download the following assets:
- Video/Eness vertebrates 12.mp4 (local play / download options / download from dropbox)
- Video/Agness Tembo at eLA 2010 Zambia.mp4 (local play / download options / download from dropbox)
- living things slideshow.odp
- Video/Eness vertebrates 2.mp4 (local play / download options / download from dropbox)
- Video/Eness vertebrates 4.mp4 (local play / download options / download from dropbox)
- Video/Eness vertebrates 6.mp4 (local play / download options / download from dropbox)

